Boat Deck Installation: King Plank
A king plank runs down the center of the boat and is made from the E-600. This plank is glued to the deck when the margins are laid, before you fill in the deck. MAKE SURE YOUR KING PLANK IS CENTERED! Once you’ve glued down your king plank, use the roller on it.

Fig. 12

Fig. 13
After it has cured, the main deck is dry fit, leaving enough material to cover the king plank (see Fig. 12). This extra material will be enough to shape the ends of the main deck strips to fit into the king plank. Make a template of your chosen plank design and trace the shape onto the body planks that are overlapping the king plank. Make sure they line up properly to create a consistent pattern. Cut the shapes out. Vinyl shears work great for this.

Fig. 14

Fig. 15

Fig. 16

Fig. 17

Fig. 18

Fig. 19
Lay the cut planks down and trace the new design onto the king plank itself (see Fig. 13). Cut the shapes out of the king plank using your utility knife with a curved blade. Pull the pieces out so the ends of your planks fit into the king plank. A fairly tight fit is desired, as this will make it easier after your entire deck is glued (see Fig. 14 – 18) and you go back to cut out a ¼” caulk line around each piece (see Fig. 19 and Fig. 20 and the section on “Seams”).
Fig. 21 shows our nearly finished king plank. There are many variations on king plank designs so check out other boat builders to see more styles and options.
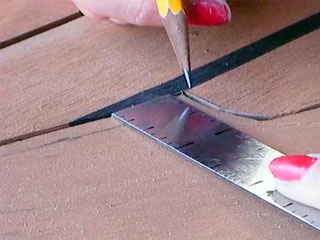
Fig. 20

Fig. 21